


همتراز کاشی چیست؟ همتراز یا تراز کننده، قطعه ای بسیار کاربردی است که به منظور هم سطح کردن کاشی ها و سرامیک ها در کف یا در دیوارها مورد استفاده قرار می گیرد. به کمک این قطعه جدید که به تازگی در صنعت کاشی کاری ورود پیدا کرده، کاشی ها بهتر در هم چفت می شوند و در نهایت کار جلوه بهتری پیدا می کند.
همتراز کاشی به طور همزمان به سطح رویی و زیرین سرامیک فشار وارد می کند و شرایطی را فراهم می سازد تا سرامیک ها به لحاظ ارتفاعی در یک سطح قرار بگیرند. در ادامه بیشتر با این قطعه و نحوه عملکرد آن آشنا می شویم.
آشنایی با همتراز کاشی
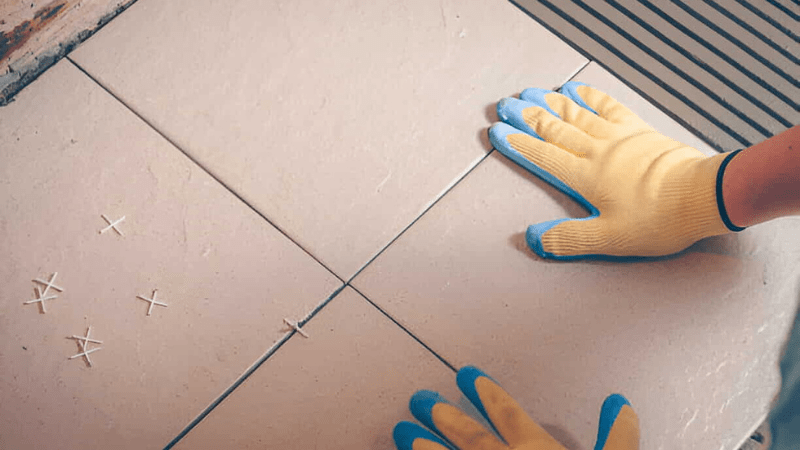
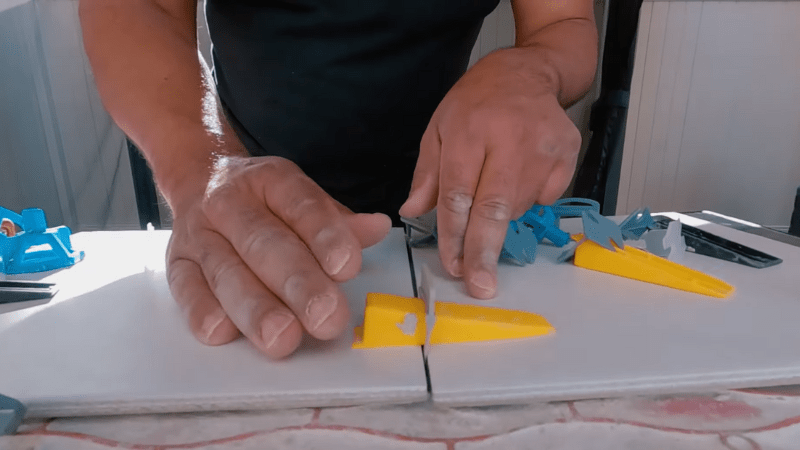
همتراز کاشی از جمله تجهیزات بسیار کاربردی است که مجریان نصب سرامیک به واسطه آن می توانند کار خود را با سرعت بیشتر، راحت تر و البته با نتیجه بهتری انجام دهند. این قطعه از دو بخش تشکیل شده و شامل گوه همتراز و کلیپس همتراز می شود. گوه یا به اصطلاح نری، به رنگ های مشکی، آبی و یا قرمز تولید می شود و کلیپس یا مادگی به رنگ سفید یا شفاف است.
روش استفاده همتراز کاشی به این شکل است که به هنگام نصب کاشی، کلیپس تراز کننده میان سرامیک و کاشی درون بند قرار می گیرد و توسط گوه قفل می شود. این عملکرد سبب یک دست و هم سطح شدن کاشی ها و سرامیک های کناری خواهد شد؛ به این ترتیب نیازی نیست که مجریان نصب به واسطه چکش های لاستیکی و وارد کردن ضربه به کاشی و سرامیک، آن ها را هم سطح کنند.
با ورود این قطعه به صنعت کاشی کاری، کار بسیار آسان تر پیش می رود و نسبت به روش های سنتی سرعت عمل کار نیز افزایش پیدا کرده است.
استفاده از همتراز کاشی چه مزایایی دارد؟
استفاده از همتراز کاشی جهت نصب سرامیک پرسلان کف یا سرامیک دیواری، مزیت های بسیار زیادی به همراه دارد که از جمله آن ها می توانیم به موارد زیر اشاره داشته باشیم.
عدم ایجاد لک و تیرگی
یکی از مشکلاتی که همواره برای کاشی ها و سرامیک ها ایجاد می شود، ایجاد لک و تیرگی میان بندهای آن است. این اتفاق زمانی می افتد که آب میان بندهای کاشی تجمع پیدا کند و علت آن، عدم هم سطح بودن سرامیک های مجاور است. با استفاده از همتراز، این مشکل از بین می رود.
افزایش سرعت کار
از دیگر مزایای همتراز کاشی چیست؟ در پاسخ به این سوال می توانیم به نقش موثر این محصول در بالا رفتن سرعت و دقت کار اشاره کنیم. همان طور که می دانید در روش های سنتی برای نصب یک سرامیک وقت زیادی سپری می شود؛ چرا که هر سرامیک باید با ضربات متعدد به واسطه چکش های لاستیکی تراز شود، اما این ابزار جدید در کمترین زمان ممکن کاشی ها را همتراز می کند.
عدم نیاز به مهارت و تجربه
برای کار با همتراز برخلاف روش های قدیمی و سنتی نیازی به داشتن تجربه و مهارت بالا نیست. افراد به راحتی می توانند حتی با کمترین تجربه با این وسیله کار کنند و در نهایت نتیجه ای قابل قبول و زیبا دریافت نمایند.
امکان تردد
با توجه به اینکه سیستم عملکرد همتراز کاشی مانند قفل و بست عمل می کند، بعد از نصب کاشی ها به واسطه آن، به راحتی می توان روی سرامیک تردد کرد و نیازی نیست تا خشک شدن ملات صبر کنید.
انواع همتراز کاشی
همتراز کاشی انواع مختلفی دارد و در مدل های گوناگون تولید و عرضه می شود. هر یک از مدل های مختلف این محصول کاربردهای خاص خود را دارند. در ادامه انواع همتراز کاشی را معرفی خواهیم کرد.
همتراز کاشی کلیپس و گوه
این مدل همتراز در سه سایز مختلف تولید می شود و جزو محبوب ترین نوع همترازها به شمار می رود. مدل های کوچک این محصول با ارتفاع داخلی کلیپس ۱۷ میل، برای نصب کاشی های با ابعاد ۲۰ × ۲۰_ ۳۰ × ۳۰ و ۴۰ × ۴۰ مورد استفاده قرار می گیرند و برای کاشی های با ضخامت ۶ تا ۸ میلی متر مناسب هستند.
مدل های متوسط آن دارای ارتفاع داخلی کلیپس ۲۰ میل هستند و برای نصب سرامیک های با ابعاد ۶۰ × ۶۰ _ ۸۰ × ۸۰ و ۱۰۰× ۱۰۰ کاربرد دارند. از این همتراز برای کاشی ها و سرامیک های با ضخامت ۸ تا ۱۲ میلی متر استفاده می کنند.
همترازهای بزرگ با ارتفاع داخلی کلیپس ۲۳ میل، برای نصب سرامیک های با ابعاد ۱۲۰ × ۱۲۰ و ۱۲۰ × ۲۴۰ و اسلب ها به کار می روند. این همترازها برای سرامیک های با ضخامت ۱۰ تا ۱۶ میلی متر مناسب هستند.
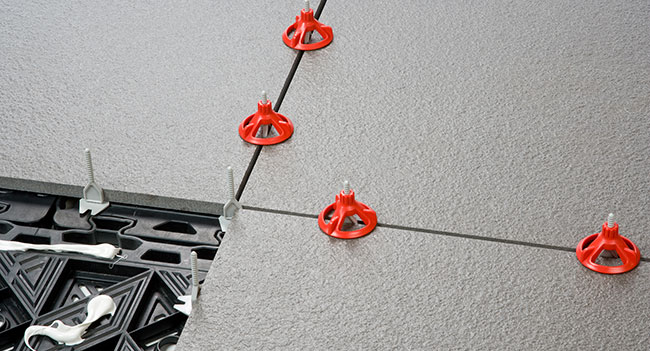
همتراز کاشی پیچی
اگر می پرسید از دیگر انواع مدل های همتراز کاشی چیست، می توانیم به مدل های پیچی اشاره کنیم که به دلیل عدم استفاده از انبر همتراز در نصب آن، معمولاً نسبت به همتراز تخت، قدرت تاب گیری پایین تری دارد؛ از این رو کمتر مورد استفاده قرار می گیرد. همتراز پیچی با چرخش دست سفت می شود و تا حدودی سرامیک ها و کاشی ها را هم سطح می کند. این همتراز برای سرامیک های ۶ تا ۱۴ میل مناسب است.
همتراز پروانه ای
همتراز کاشی پروانه ای از جدیدترین همترازهایی است که وارد بازار شده و همان طور که از اسمش پیداست مانند پروانه دو بال دارد. هنگام استفاده باید دو بال پروانه را روی سرامیک بخوابانید که به این ترتیب با ایجاد فشار به سرامیک های مجاور، آن ها را همتراز می کند. از معایب همتراز کاشی پروانه ای می توانیم به قدرت تاب گیری متوسط و قیمت بالای آن اشاره کنیم که باعث شده کمتر مورد استفاده قرار گیرد.
چگونه از همتراز استفاده کنیم؟
روش استفاده از همتراز کاشی برای بسیاری از کاربران جای سوال دارد. در رابطه با روش کار این قطعه باید بگوییم که برای شروع کار ابتدا سطح مورد نظر را زیرسازی می کنند. در قدم بعدی با استفاده از ماله مخصوص، چسب کاشی را با ضخامت مناسب روی سطح مورد نظر پهن کرده و سرامیک را روی آن قرار می دهند.
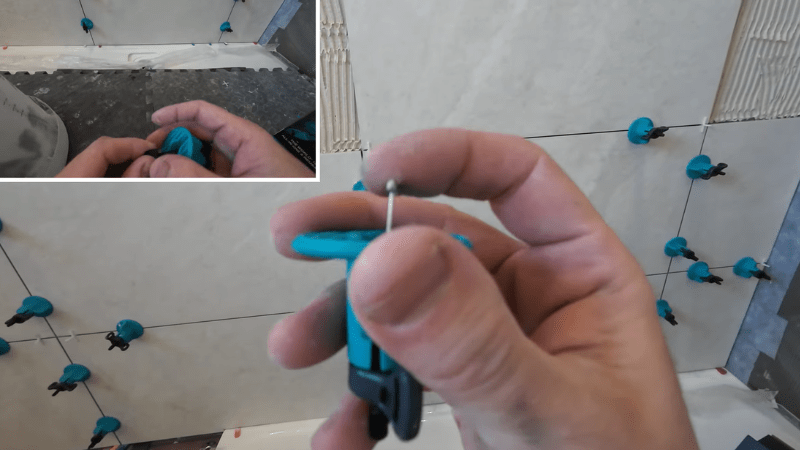
سپس کلیپس یا مادگی همتراز را در کنار سرامیک قرار داده و بعد سرامیک بعدی را قرار می دهند و گوه هم ترازو یا همان نری را از درون کلیپس همتراز رد می کنند. در مرحله بعدی با کمک آچار، همتراز را سفت می کنند. این کار تا جایی ادامه پیدا می کند که کل سطح با استفاده از سرامیک پوشش داده شود. بعد از اینکه چسب کاشی خشک شد، می توان همتراز ها را از آن جدا کرد.
پس از گذشت حداقل 24 ساعت، برای جداسازی همتراز، کافی است با استفاده از چکش لاستیکی یا حتی نوک کفش از بغل به کلیپس ضربه وارد کنید. بعد از اتمام کار با استفاده از پودرهای بندکشی مرغوب، بندهای سرامیک را نیز پر کنید تا کار جلوه بهتری پیدا کند.
در هر متر مربع به چند عدد کلیپس و گوه نیاز داریم؟
تعداد کلیپس و گوه های مورد نیاز برای پوشش یک سطح با استفاده از سرامیک و کاشی، به عوامل متعددی وابسته است. برای برآورد تعداد کلیپس و گوه ها باید به جدول زیر رجوع شود؛
تعداد کلیپس و گوه مصرفی برای هر متر مربع | سایز سرامیک به سانتی متر |
42 | 30×30 |
20 | 40×40 |
10 | 60×60 |
10 | 80×80 |
10 | 100×100 |
10 | 60×120 |
10 | 80×160 |
10 | 120×280 |
10 | 160×320 |
اگر بخواهید همین محیط را با سرامیک های درجه یک و با ابعاد بزرگ تر پوشش دهید، تعداد کلیپس و گوه ها کاهش پیدا می کند؛ چرا که سرامیک های مرغوب و درجه یک نسبت به سرامیک های درجه ۲ و درجه ۳ موج کمتری دارند.
در نظر داشته باشید که برای بررسی تعداد کلیپس و گوه ها در یک پروژه، تعداد گوه ها باید کمتر از کلیپس ها در نظر گرفته شود؛ چرا که کلیپس ها تنها یک بار قابلیت استفاده دارند و گوه ها را می توان تا چندین مرتبه استفاده کرد. معمولاً نسبت تقریبی کلیپس به گوه 3 به ۱ در نظر گرفته می شود. هر گوه حداقل 2 بار قابلیت استفاده دارد و اگر کیفیت آن بیشتر باشد تعداد دفعات استفاده از آن نیز افزایش پیدا می کند.
سخن پایانی
در این مطلب بررسی کردیم که همتراز کاشی چیست و به چه منظوری مورد استفاده قرار می گیرد. به طور کلی همتراز کاشی قطعه ای کاربردی از جنس پلاستیک است که برای هم سطح کردن سرامیک ها کاربرد دارد. این قطعه در انواع پیچی، تخت یا پروانهای عرضه می شود و نقش موثری در زیبایی و جذابیت نهایی کار ایفا می کند. عدم ایجاد لک و تیرگی در دراز مدت، افزایش سرعت و دقت کار، عدم نیاز به تجربه و مهارت بالا، از مزیت هایی است که با وجود همتراز می توان از آن ها بهره برد.