


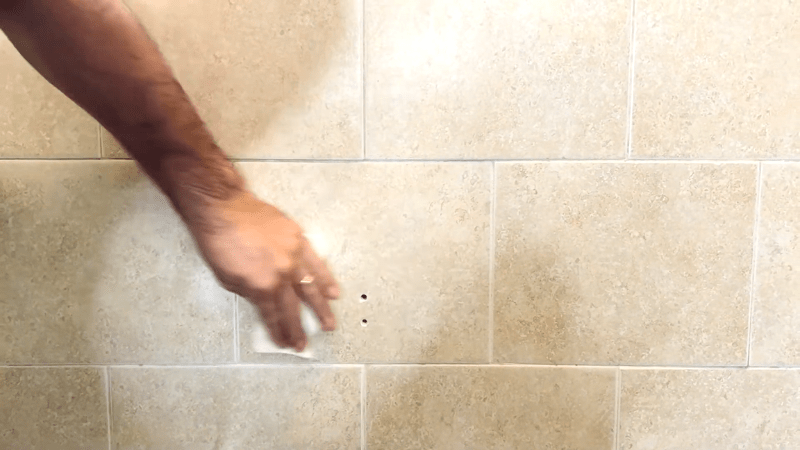
سرامیک و کاشی به دلیل ظاهر زیبا، مقاومت و دوام بالا از محبوب ترین انواع پوشش های دیوار و کف در ساختمان ها هستند. اما با نصب وسایل مختلف مانند کابینت، قفسه و آینه ها، نیاز به ایجاد سوراخ هایی برای قرار دادن پیچ و رولپلاک پیش می آید. زمانی که این وسایل جا به جا شده یا دیگر استفاده نمی شوند، جای این سوراخ ها باقی می ماند و ظاهر سطح را نامرتب می کند.
بنابراین، پوشاندن این سوراخ ها برای حفظ زیبایی و یکپارچگی سطوح ضروری است. در این مطلب، به بررسی روش ها و مراحل پوشاندن سوراخ روی سرامیک پرداخته و نحوه بازگرداندن زیبایی و کارایی سطح را توضیح می دهیم.
دلایل پوشاندن سوراخ روی سرامیک
پوشاندن سوراخ ها و جای رولپلاک روی سرامیک و کاشی دلایل متعددی دارد که می تواند شامل جنبه های زیبایی، عملکردی و محافظتی باشد:
زیبایی و دکوراسیون
یکی از اصلی ترین دلایل پوشاندن سوراخ ها و جای رولپلاک، حفظ زیبایی و یکپارچگی ظاهری کاشی و سرامیک است. وجود سوراخ ها و جای رولپلاک می تواند به طور چشم گیری از جذابیت بصری دیوارها یا کف پوش ها بکاهد و باعث ایجاد ظاهری نامناسب و نازیبا شود. با پوشاندن این نقاط، می توان به دکوراسیون داخلی فضایی منظم و زیبا بخشید.
محافظت و جلوگیری از آسیب
پوشاندن سوراخ روی سرامیک می تواند به جلوگیری از ورود رطوبت و آلودگی به زیر سطح کاشی یا سرامیک کمک کند. در صورتی که سوراخکاری سرامیک به درستی پوشانده نشود، ممکن است رطوبت و مواد شیمیایی به بافت زیرین نفوذ کرده و باعث آسیب به ساختار کاشی یا سرامیک گردد. این موضوع می تواند منجر به ایجاد لکه، تغییر رنگ و حتی کاهش عمر مفید کاشی ها شود.
افزایش عمر مفید
با پوشاندن سوراخ ها و جای رولپلاک، می توان عمر مفید کاشی و سرامیک را افزایش داد. این کار به حفظ ساختار و کیفیت مواد کمک کرده و از آسیب های احتمالی جلوگیری می کند. این موضوع به ویژه در محیط های مرطوب، اهمیت بیشتری دارد.
راحتی در نگهداری و تمیزکاری
پوشاندن سوراخ روی سرامیک می تواند نگهداری و تمیزکاری کاشی و سرامیک را آسان تر کند. سطوح یکنواخت و بدون نقص، به راحتی قابل تمیز کردن هستند و تجمع گرد و غبار و آلودگی در سوراخ ها را کاهش می دهند.
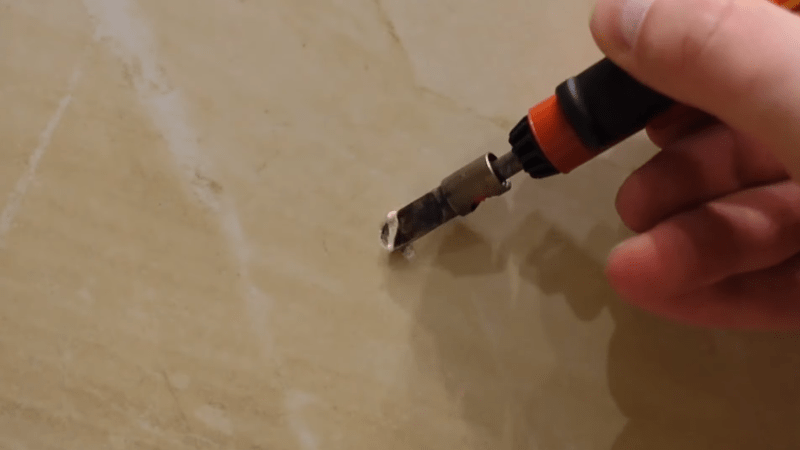
روش های پوشاندن جای رولپلاک روی کاشی و سرامیک
پوشاندن سوراخ ها و جای رولپلاک روی سرامیک و کاشی می تواند به سادگی با استفاده از روش های مختلفی انجام شود:
چسب و خمیر مخصوص کاشی و سرامیک
این روش یکی از ساده ترین و اقتصادی ترین راه ها برای تعمیر سوراخ های کوچک است. محصولات مخصوص تعمیر سرامیک در فروشگاه های لوازم ساختمانی موجود هستند و به صورت تخصصی برای این کار طراحی شده اند:
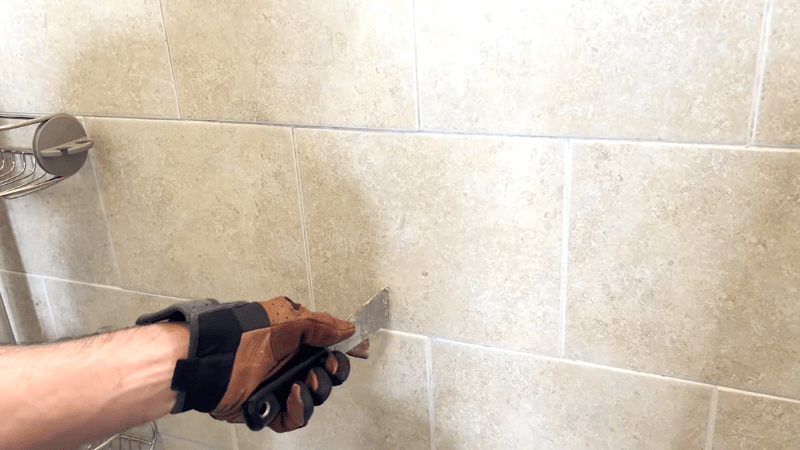
- برای پوشاندن سوراخ روی سرامیک، ابتدا سطح سرامیک را کاملاً از گرد و غبار و هرگونه آلودگی پاک کنید تا چسب یا خمیر بتواند به خوبی به سطح بچسبد.
- مقدار مناسبی از خمیر یا چسب را با استفاده از یک کاردک یا ابزار مشابه روی سوراخ اعمال کنید.
- پس از پر کردن سوراخ، توجه نمایید که سطح خمیر با سطح سرامیک هم سطح شود و با دقت آن را صاف کنید.
- اجازه دهید خمیر یا چسب به طور کامل خشک شود. سپس با استفاده از یک سمباده نرم، سطح را صاف کنید تا هر گونه برجستگی یا ناهماهنگی برطرف گردد.
استفاده از دوغاب
این روش پوشاندن جای رولپلاک روی کاشی، برای سوراخ ها و ترک های کوچک کاربردی و موثر است:
- دوغاب را با ترکیب سیمان، پودر سنگ و آب، طبق دستورالعمل بسته بندی آماده کنید.
- با استفاده از یک کاردک، دوغاب را به درون سوراخ بمالید و آن را صاف کنید تا هم سطح با سایر سطوح شود.
- اجازه دهید دوغاب به خوبی خشک شود.
- پس از خشک شدن، با یک پارچه تمیز و مرطوب سطح را پاک کنید تا باقی مانده دوغاب از روی سرامیک برداشته شود.
- بایستی به این نکته که دوغاب در برابر سایش و خوردگی دوام کمتری به نسبت چسب و مواد بندکشی سرامیک دارد و چسبندگی مناسب به سطح را هم ندارد، توجه گردد.
پلاک های تزیینی یا کاشی کوچک
این روش خلاقانه برای مواقعی مناسب است که می خواهید دکوراسیون را نیز تغییر دهید:
- اندازه و شکل سوراخ را بررسی کرده و یک پلاک یا کاشی تزیینی مناسب انتخاب کنید.
- پلاک یا کاشی را به اندازه لازم برش دهید.
- با استفاده از چسب مخصوص کاشی، پلاک یا کاشی را به محل سوراخ بچسبانید.
- ناحیه اطراف را به دقت تمیز کنید و مطمئن شوید که چسب به خوبی خشک شده است.
موم یا رزین های مخصوص تعمیر سرامیک
این مواد برای تعمیر سرامیک کف ساختمان و پوشاندن سوراخ های کوچک استفاده می شوند. این محصولات به آسانی در فروشگاه های تخصصی قابل تهیه هستند:
- برای پوشاندن سوراخ روی سرامیک باید ابتدا رزین یا موم را طبق دستورالعمل آماده کنید.
- با یک کاردک کوچک یا ابزار دقیق، رزین یا موم را داخل سوراخ بگذارید و سطح را صاف کنید.
- اجازه دهید رزین یا موم به خوبی خشک شود تا سطح همواری به دست آید.
نصب گیره یا لوازم تزیینی
اگر سوراخ به دلیل نصب وسایل ایجاد شده و دیگر نیازی به آن ندارید، می توانید از این روش استفاده کنید:
- سوراخ را کاملاً تمیز کنید.
- یک گیره یا وسیله تزیینی انتخاب کنید که با دکوراسیون هماهنگ باشد.
- طبق دستورالعمل، گیره یا لوازم تزیینی را روی سوراخ نصب کنید تا هم سوراخ پوشانده شود و هم به دکوراسیون محیط اضافه گردد.
سخن پایانی
پوشاندن سوراخ ها و جای رولپلاک روی سرامیک و کاشی نه تنها به بهبود ظاهر فضا کمک می کند، بلکه از نفوذ رطوبت و رشد کپک ها نیز جلوگیری می نماید. با انجام صحیح مراحل فوق و استفاده از مواد مناسب، می توانید به راحتی این نقایص را برطرف کنید و به زیبایی پیشین فضا بازگردید. پوشاندن سوراخ روی سرامیک نه تنها هزینه های تعویض کاشی یا سرامیک را کاهش می دهد، بلکه به حفظ ارزش کلی ساختمان نیز کمک می کند.