


تعویض سرامیک شکسته کف یا دیوار، یکی از بزرگ ترین چالش هایی است که معمولاً بعد از نصب کاشی و سرامیک با آن مواجه می شویم. کاشی ها جزو مصالح پرکاربرد و البته بسیار مقاومی هستند که معمولاً عمر و دوام زیادی دارند.؛ اما زمانی که ابزارآلات یا اشیاء و لوازم سنگین از ارتفاع زیاد با سرامیک برخورد کنند، ممکن است که بشکنند یا ترک بردارند.
این مشکل اگرچه آزاردهنده است و جلوه نامناسبی به محیط می دهد، اما جای نگرانی ندارد؛ چراکه می توان با چند اقدام ساده، به راحتی سرامیک شکسته را با سرامیک نو تعویض کرد. در این مطلب قدم به قدم مراحل تعویض سرامیک شکسته را توضیح می دهیم تا در صورت ایجاد این حادثه، به راحتی بتوانید همه چیز را به روز اول برگردانید.
نحوه ترمیم کاشی ترک خورده یا تعویض کاشی شکسته
کاشی و سرامیک، متریال هایی هستند که معمولاً مقاومت و دوام آن ها در برابر فشار و ضربه بسیار زیاد است؛ اما زمانی که یک جسم سنگین از ارتفاع زیاد روی آن ها رها شود ترک خوردگی یا شکستن سرامیک امری بدیهی است. کاشی شکسته یا ترک خورده جلوه نامناسبی به فضا می بخشد؛ اما این مشکل با چند اقدام ساده به راحتی برطرف می شود.
تعویض کاشی شکسته دیوار یا کف، کار چندان سختی نیست و جزو آن دسته پروژه هایی محسوب می شود که با چند ابزار ساده و طی چند مرحله توسط خود افراد قابل انجام است. پس زمانی که سرامیک های کف یا دیوار به هر دلیلی دچار آسیب شدند اصلاً جای نگرانی ندارد. برای این کار تنها به یک سری ابزارها و تجهیزات نیاز دارید که قبل از شروع کار باید آن ها را تهیه کنید. این ابزار عبارتند از:
- ابزار لبه دار برای خارج کردن دوغاب
- چکش مناسب
- دریل برای سوراخ کاری
- قلم تخریب برای تخریب سطح کار
- ماله دندانه دار
- چسب مناسب برای اتصال کاشی به سطح
- کاشی و سرامیک سالم و هماهنگ با طرح قبلی، برای جایگزین کردن
نکات مهم قبل از شروع به کار تعویض سرامیک
قبل از اینکه برای تعویض سرامیک شکسته کف اقدامی انجام دهید، باید یک سری نکات لازم و ضروری را بدانید و با نحوه کار با متریال ها و ابزار لازم برای این کار به خوبی آشنا شوید. این نکات به شرح زیر هستند:
هماهنگی سرامیک جدید
دقت داشته باشید که سرامیک جدید برای تعویض باید با سرامیک شکسته به لحاظ طرح، رنگ، سایز و اندازه و البته ضخامت تناسب و هماهنگی داشته باشد؛ از این رو توصیه می کنند که همیشه تعدادی سرامیک بیشتر تهیه کنید تا در صورت بروز چنین مواردی به مشکل برنخورید. اگر سرامیک اضافه از نصب قبلی ندارید، قسمت شکسته سرامیک را بردارید و با مراجعه به مراکز فروش، سرامیک مناسب را پیدا کنید.
توجه به کیفیت
به کیفیت کاشی دقت داشته باشید و با خرید کاشی های درجه یک، جلوی بروز مجدد این مشکل را بگیرید. به طور مثال می توانید سرامیک های پرسلان را انتخاب کنید. قیمت سرامیک پرسلان دیوار به دلیل کیفیت بالای آن اندکی زیاد است؛ اما مقاومت و دوام بالای آن، ارزش این میزان هزینه را دارد.
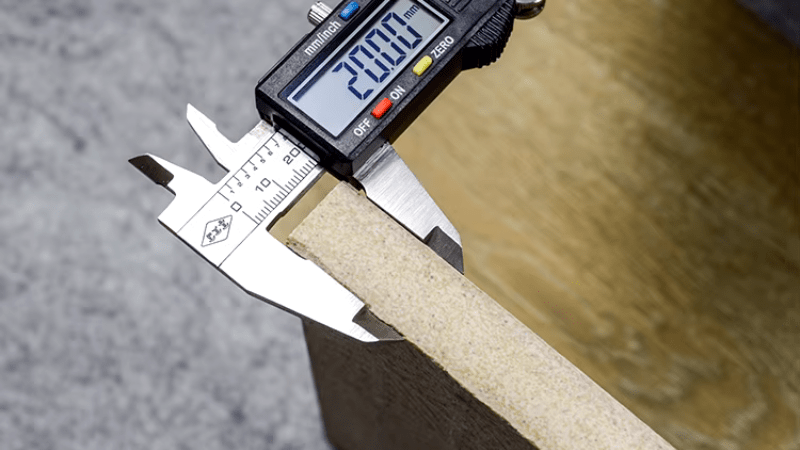
بررسی ضخامت
برای تعویض کاشی شکسته به ضخامت کاشی نیز دقت داشته باشید و تا حد امکان کاشی هایی را برای خرید انتخاب کنید که ضخامت آن ها با ضخامت قطعه شکسته که با خود همراه دارید یکسان باشد.
در صورتی که کاشی های با ضخامت مناسب را پیدا نکردید به سراغ کاشی هایی با ضخامت کمتر بروید. در این شرایط می توانید با اضافه کردن ماستیک به زیر کار، کاشی را با سطح و با کاشی های مجاور همتراز کنید؛ اما خرید کاشی های ضخیم تر از نمونه، ممکن است چالش های بیشتری به همراه داشته باشد و کمی دردسرساز شود.
علت یابی و رفع مشکل
اگر سرامیک بر اثر نشست خانه، نفوذ نم و مشکلاتی از این دست دچار آسیب شده است، ابتدا مشکلات مربوط به زیرسازی را حل کنید و سپس به ترمیم سرامیک لب پر شده بپردازید.
استفاده از تجهیزات ایمنی
حتماً حین کار از دستکش و عینک استفاده کنید تا گوشه های تیز و برنده سرامیک به دست یا چشمتان آسیبی نرساند.
استفاده از مواد بندکشی مناسب
با توجه به شرایط محیط، از مواد بندکشی یا چسب های مخصوص برای تعویض سرامیک شکسته کف کمک بگیرید. به طور مثال اگر کاشی شکسته مربوط به فضاهای مرطوب نظیر حمام یا سرویس بهداشتی است، ممکن است به مواد بندکشی مخصوص، چسب کاشی یا کیت تعمیر کاشی مناسب برای مناطق مرطوب نیاز داشته باشید.
هماهنگی رنگ مواد بندکشی
به رنگ مواد بندکشی یا چسب و هماهنگ بودن آن با رنگ مواد بندکشی اطراف کاشی شکسته، دقت داشته باشید. برای اطمینان از هماهنگ بودن رنگ مواد بندکشی جدید با رنگ مواد بندکشی قبلی، کافی است مقدار کمی از آن را روی یک تکه مقوا بریزید و اجازه دهید تا به مدت ۲۴ ساعت خشک شود. سپس رنگ و بافت آن را با مواد بندکشی محل مورد نظر مقایسه کنید.
مراحل جایگزینی سرامیک یا کاشی شکسته
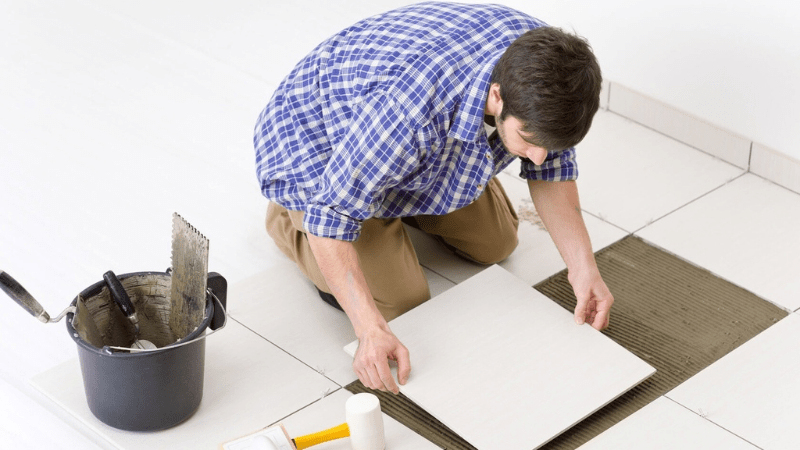
برای تعویض سرامیک شکسته کف، مراحل متعددی وجود دارد که باید با دقت تمامی این مراحل را پشت سر بگذارید تا در نهایت بهترین نتیجه را از عملکرد خود دریافت کنید. برای شروع کار مرحله به مرحله به روش زیر عمل کنید.
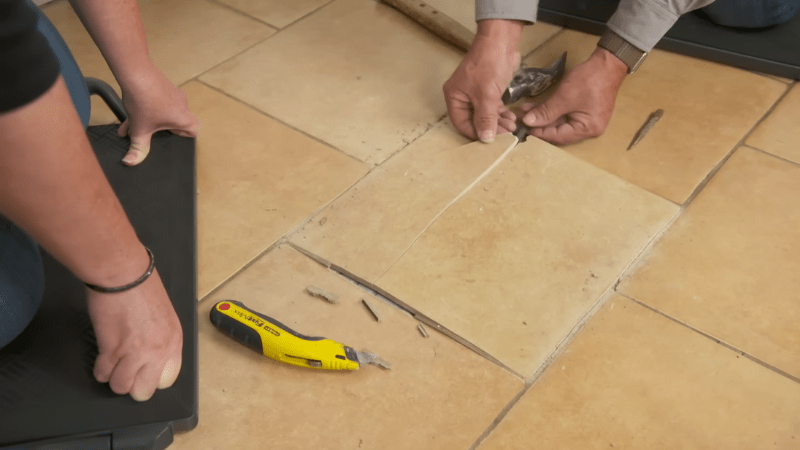
گام اول حذف مواد بندکشی
در این مرحله به کمک ابزارهای مناسب، مواد بندکشی را از اطراف کاشی به آرامی جدا کنید. این کار باید با دقت و آرامش بیشتری انجام شود تا آسیبی به اطراف یا سطح زیر کار وارد نشود. برای برداشتن مواد بندکشی فشار کافی ایجاد کنید؛ اما این فشار نباید آن قدر زیاد باشد که کاشی های مجاور را خراب کند.
در حین کار از چشمان خود در برابر تراشه ها و گرد و غبار محافظت کنید. حتماً عینک ایمنی بزنید و سپس به کمک ابزارهای مناسب، مواد بندکشی اطراف کاشی شکسته را خارج کنید.
گام دوم شل کردن کاشی
در این مرحله از مراحل تعویض کاشی شکسته دیوار، به منظور حفاظت از لبه های کاشی های اطراف، از نوارچسب کمک بگیرید و دور تا دور کار را چسب بزنید. سپس با کمک دریل، سوراخ هایی با فاصله های مساوی روی قسمت های شکسته کاشی ایجاد کنید. بهتر است از مته های سرامیکی ۱.۴ اینچی برای این کار کمک بگیرید. با این روش کاشی به قطعات متعددی تقسیم می شود و آزاد کردن آن راحت تر صورت می گیرد.

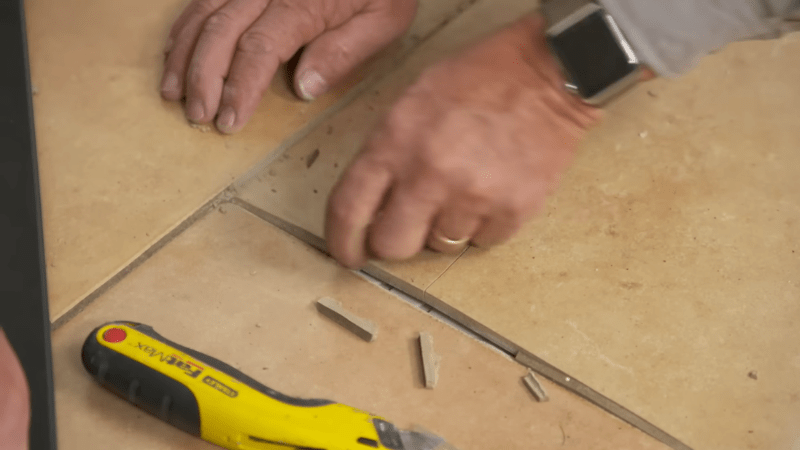
گام سوم خارج کردن خورده ها
اکنون برای تعویض سرامیک شکسته کف از قسمت مرکز به سمت لبه ها کار کنید و با کمک یک قلم باریک یا یک چکش، قطعات شکسته را به آرامی بیرون بکشید. اگر قطعه های کاشی به سختی جدا می شوند، از یک قلم کاشی یا پیچ گوشتی کمک بگیرید و با ضربه زدن به زیر قطعات شکسته، آن ها را به راحتی از سطح جدا کنید.
بعد از اینکه تمامی کاشی های شکسته را برداشتید، برای از بین بردن لایه های نازک قدیمی از بستر، از یک قلم پهن تر کمک بگیرید. سعی کنید تمام مواد بندکشی مجاور و ملات های زیر کار را با دقت و حوصله جدا کنید. البته نیازی نیست که سطح کار کاملاً صاف باشد؛ اما بهتر است همه عواملی که مانع از هم تراز شدن کاشی جایگزین با کاشی های مجاور می شوند، پاکسازی شوند.
گام چهارم جایگزین کردن کاشی جدید
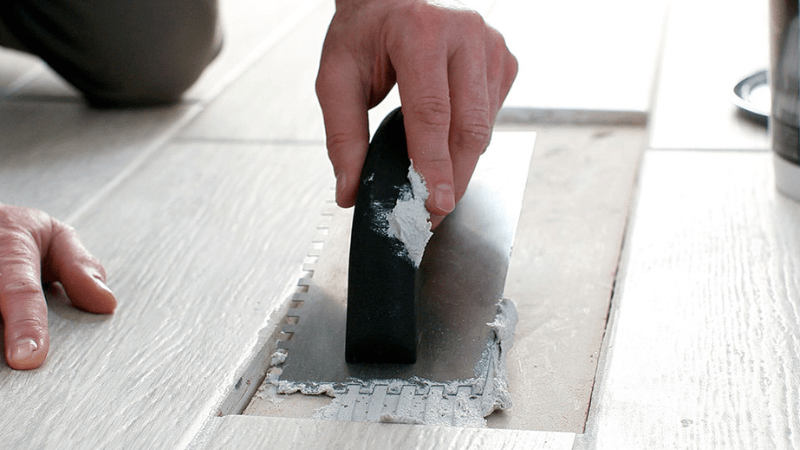
در این مرحله باید کاشی و سرامیک پرسلان جدید را روی سطح مورد نظر نصب کنید. برای این کار ابتدا کاشی را در محل قرار دهید و بررسی کنید که چه میزان تفاوتی با سطح دارد. سپس کاشی را بردارید و به همان میزان ملات چسب زیر کار بریزید.
با ایجاد ضربه های ملایم، کاشی را به سطح بچسبانید. دقت کنید که ضربه ها نباید انقدر محکم باشند که کاشی فرو برود و با کاشی های مجاور تفاوت سطح پیدا کند. همچنین تنظیم کنید که فاصله آن از همه طرف یکسان و یک اندازه باشد.
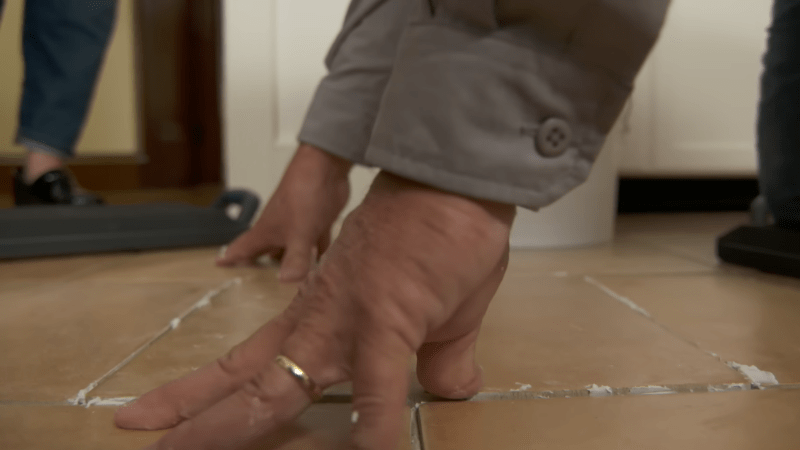
گام پنجم پر کردن درزها با مواد بندکشی
در این مرحله از مراحل تعویض سرامیک شکسته کف، کار چندان سختی ندارید. تنها کافی است با توجه به دستورالعمل های درج شده روی بسته بندی ماده بندکشی، آن را آماده و مخلوط کنید. سپس با کمک یک ماله، ماده بندکشی را به محل اتصالات بریزید و بخش های خالی و اطراف کاشی را با دقت پر کنید. بعد از گذشت ۱۵ الی ۲۰ دقیقه، زمانی که مطمئن شدید ماده بندکشی کاملاً خشک شده و حالت چسبندگی ندارد، با کمک یک اسفنج مرطوب شده، اضافی دوغاب ها را از روی سطح پاک کنید.
گام ششم خشک شدن
به مدت ۲۴ ساعت صبر کنید تا سرامیک جدید به درستی خشک شده و استحکام کافی را پیدا کند. در این مدت زمان به هیچ عنوان روی سرامیک راه نروید و از قرار دادن اشیاء سنگین و ایجاد فشار روی آن جلوگیری کنید.
سخن پایانی
در این مطلب در رابطه با نحوه تعویض سرامیک شکسته کف صحبت کردیم. همان طور که می دانید کاشی ها و سرامیک ها از متریال هایی هستند که معمولاً برای پوشش سطح یا دیوارها مورد استفاده قرار می گیرند. این محصولات معمولاً مقاومت و دوام بالایی دارند؛ اما در صورت ایجاد فشار و ضربه های سهمگین، دچار شکستگی می شوند.
در این شرایط می توانید با راهکارهایی که در این مقاله اشاره کردیم، بدون پرداخت هزینه های بالا و به راحتی مشکل را خودتان حل کنید. برای شروع کار ابتدا ابزار مورد نیاز خود را آماده کنید. به هماهنگ بودن ضخامت و رنگ و طرح کاشی جدید با کاشی شکسته شده دقت داشته باشید و با توجه به شرایط محیط، از مواد بندکشی و ملات های مخصوص استفاده کنید.