


جدا شدن کاشی از دیوار می تواند باعث نارضایتی و ایجاد مشکلاتی در زیبایی و کارایی فضا شود. این مسئله معمولاً ناشی از عوامل مختلفی مانند مشکلات فنی، شرایط محیطی و حتی نحوه نصب کاشی است. در ادامه به بررسی برخی از مهم ترین علت جدا شدن کاشی از دیوار می پردازیم تا با شناخت هریک از این موارد بتوان مانع از بروز این مشکل شد.
علت جدا شدن کاشی از دیوار چیست؟
شناخت علل جدا شدن کاشی از دیوار اهمیت زیادی دارد؛ زیرا این آگاهی به ما کمک می کند تا از پیشرفت مشکلات جلوگیری کنیم و هزینه های تعمیر و نگهداری را کاهش دهیم. همچنین، با شناسایی عوامل موثر، می توانیم در نصب و انتخاب مواد مناسب دقت بیشتری داشته باشیم تا کیفیت و دوام کاشی کاری افزایش یابد. در نهایت، این شناخت به حفظ زیبایی و کارایی فضا کمک می کند و تجربه بهتری از استفاده از فضاهای کاشی شده فراهم می آورد.
در ادامه به برخی از مهمترین علت جدا شدن کاشی از دیوار اشاره خواهیم کرد.
استفاده از چسب بی کیفیت
کاشی و سرامیک پرسلانی جذب آب کمی دارند و ممکن است به ملات نچسبند. استفاده از چسب بی کیفیت در این شرایط، مشکل چسبندگی را تشدید می کند؛ بنابراین، برای جلوگیری از لقی کاشی و سرامیک پرسلانی روی دیوار، مهم است که از چسب با کیفیت مناسب استفاده شود تا چسبندگی لازم تأمین گردد.
درزگیری اشتباه
بندکشی یکی از قسمت های بسیار مهم در کاشی کاری و سرامیک کاری است. اگر بندکشی به درستی انجام نشود، درزها آب بندی نمی شوند و این مسئله می تواند منجر به لق شدن کاشی و سرامیک گردد.
برای جلوگیری از لقی کاشی ها و سرامیک پرسلانی روی دیوار، باید بندکشی اصولی و درزگیری مناسب انجام شود تا درزها به خوبی آب بندی شوند. این عمل به همراه استفاده از ملات با کیفیت، مانع نفوذ شوینده ها به زیر کاشی خواهد شد و در نتیجه چسبندگی بین کاشی و ملات حفظ می گردد.
تغییرات دمایی شدید
ملات و کاشی به دلیل ساختار و مواد تشکیل دهنده متفاوت، میزان انقباض و انبساط مختلفی دارند. به همین دلیل، تغییرات آب و هوایی تأثیرات متفاوتی بر هر یک از آن ها می گذارد و ممکن است باعث جدایی میان آن ها شود که در نهایت منجر به لقی کاشی ها و سرامیک پرسلانی می گردد. برای جلوگیری از این مشکل، باید دقت کافی در انتخاب مصالح و روش های نصب داشته باشید تا انقباض و انبساط هر دو ماده به خوبی مدیریت شوند.
استفاده از ملات خشک
استفاده از ملات خشک هنگام نصب کاشی و سرامیک می تواند منجر به لق شدن کاشی شود و یک علت جدا شدن کاشی از دیوار به شمار می رود؛ زیرا چسبندگی لازم برای اتصال کاشی به دیوار را تأمین نمی کند.
علت خشک بودن آن ممکن است به دلیل عدم نصب به موقع کاشی پس از آماده سازی ملات باشد. بنابراین، برای جلوگیری از این مشکل، باید تلاش کنید که بین درست کردن ملات و نصب آن فاصله ای ایجاد نشده و همچنین رطوبت موجود در ملات مناسب باشد تا چسبندگی بهینه حفظ شود.
ضربه به کاشی تازه نصب شده
فشار دادن و ضربه دیدن کاشی تازه نصب شده می تواند آثار مخربی بر روی آن بگذارد. اگر کاشی ترک خورده و شما متوجه آن نشوید، ترک به مرور زمان بیشتر می شود و در نهایت ممکن است بشکند.
شکستن کاشی می تواند منجر به نفوذ هوا و رطوبت به زیر کاشی شود که در نتیجه، رطوبت نفوذ کرده اختلالی بین کاشی و ملات ایجاد کرده و میزان چسبندگی را کاهش می دهد.. برای جلوگیری از جدا شدن کاشی از دیوار، قبل از شروع نصب باید کاشی ها را به دقت بررسی کنید و از کاشی های شکسته استفاده نکنید.
ضخامت پایین ملات
استفاده از ملات با ضخامت پایین یا مقدار کم ملات هنگام کاشی کاری می تواند منجر به لق شدن کاشی شود. ملات ناکافی نمی تواند حمایت لازم را برای کاشی فراهم کند، به ویژه در نقاطی که سیستم گرمایش از کف عبور می کند یا لوله کشی وجود دارد. برای جلوگیری از مشکل جدا شدن کاشی از دیوار، باید از لایه ای با ضخامت مناسب از ملات چسب یا ملات سیمانی استفاده کرد تا از چسبندگی و استحکام کافی اطمینان حاصل شود.
عدم استفاده از چسب کاشی
استفاده نکردن از چسب کاشی و نگهدارنده مناسب می تواند دیگر علت جدا شدن کاشی از دیوار باشد. اگر کاشی انتخابی شما از جنسی باشد که با ملات شما همخوانی نداشته باشد، به مرور زمان ممکن است شل شود.
در این شرایط، باید از نگهدارنده های قوی مانند چسب کاشی مخصوص برای این نوع از کاشی ها و سرامیک ها استفاده کنید. این اقدام به شما کمک می کند تا به طور مؤثر مشکل لقی کاشی دیوار خانه را رفع کرده و از استحکام کاشی ها اطمینان حاصل نمایید.
عدم تمیز کردن کاشی قبل از نصب
تمیز نکردن کاشی دیواری قبل از نصب می تواند یکی از عوامل مهم در بروز مشکل علت جدا شدن کاشی از دیوار باشد. اگرچه شاید این نکته چندان جدی به نظر نرسد، اما تمیز کردن کاشی و دیوار قبل از چسباندن آن بسیار حائز اهمیت است.
با این کار، کثیفی ها و خاک باقی مانده از سطح کنار زده می شود. خاک باقی مانده از گچ یا کاشی قدیمی می تواند مانع از چسبیدن چسب روی دیوار شده و به مرور زمان منجر به لق شدن کاشی شود؛ بنابراین، برای رفع لقی کاشی دیوار، حتماً باید ابتدا کاشی و سطح دیوار را به خوبی تمیز کنید تا چسبندگی بهینه را تضمین نمایید.
عدم پرایمر کاری گچ زیر کاشی
پرایمر موجب می شود که سطح زیرین کاشی با یک لایه ضد آب کاملاً پوشیده شود. این لایه باعث می شود که کاشی ها به طور مؤثری به سطح بچسبند و از نفوذ آب به زیر کاشی جلوگیری کند. برای جلوگیری از مشکل جدا شدن کاشی از دیوار، به خاطر داشته باشید که پرایمر باید سطح را به طور کامل بپوشاند تا چسبندگی و دوام کاشی ها تأمین شود.
نحوه چسباندن درست کاشی پس از جدا شدن از دیوار
ال که با علت جدا شدن کاشی از دیوار آشنا شدید، بهتر است مروری بر مراحل لق گیری کاشی جدا شده داشته باشیم تا به خوبی مانع از بروز اتفاقات مشابه گردیم.
خارج کردن کاشی جدا شده
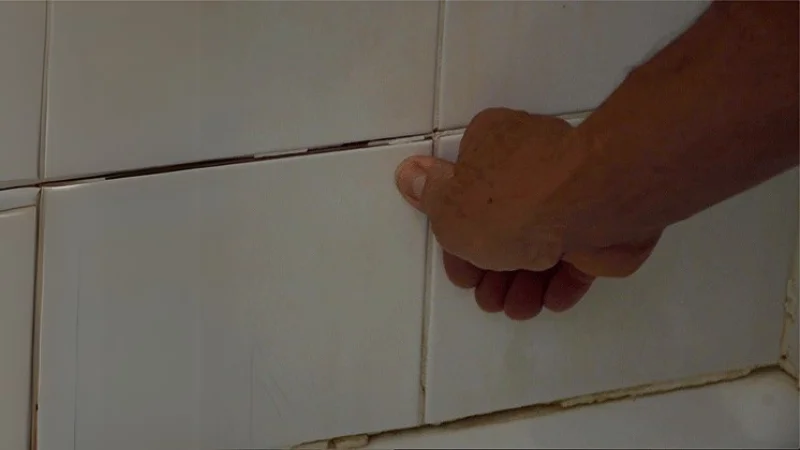
وقتی کاشی و سرامیک دیواری لق می شوند، صدای خاصی از آن ها شنیده می شود که مانند صدای اکو شده ای است که در فضای خالی زیر کاشی می پیچد. در این شرایط، باید با صبر و حوصله کاشی و سرامیک لق شده را خارج کنید.
برای این کار، با استفاده از ابزارهای مخصوص مانند فرز، کاردک و فرچه، مواد داخل بندکشی را خالی نمایید. سپس می توانید از یک قاپک برای بیرون آوردن سرامیک یا کاشی از جای خود استفاده کنید. با این روش، اگر سرامیک یا کاشی سالم باشد، احتمال شکستن آن به حداقل می رسد و می توانید دوباره از آن استفاده کنید.
تمیزی سطح زیر کاشی و استفاده از ملات و چسب جدید
بعد از اینکه کاشی را درآوردید، تمیز کردن سطح زیر آن بسیار اهمیت دارد تا برای نصب مجدد آماده شود و سطح کاملاً هم سطح با سایر نقاط گردد. برای این منظور، می توانید از چسب کاشی ضد اسید استفاده کنید که به خوبی محیط زیر کاشی را تمیز می کند و چسبندگی مناسبی را فراهم می آورد.
همچنین، برای نصب مجدد کاشی، بهتر است از ملات جدید یا چسب پودری سرامیک پرسلان استفاده کنید تا از استحکام و دوام بالا اطمینان حاصل شود. این اقدامات به جلوگیری از مشکلات ناشی از چسبندگی کاشی کمک خواهد کرد.
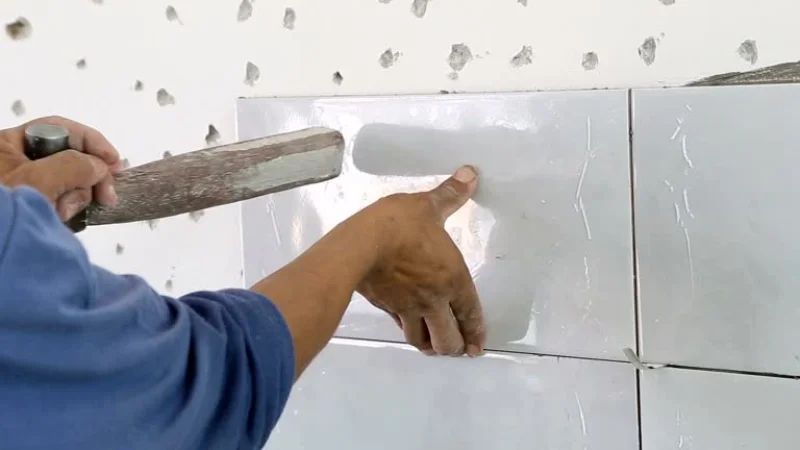
قرار دادن کاشی در محل نصب خود
برای نصب کاشی، ملات یا چسب را روی سطح بریزید و کاشی را نصب کنید. با چکش پلاستیکی آن را محکم بزنید تا همتراز شود. سپس پودر بندکشی را دور کاشی مصرف نمایید و با دستمال بقایای ملات را پاک کنید. اجازه دهید کاشی چند روز خشک شده و مورد استفاده قرار گیرد. گاهی اوقات ندادن زمان برای خشک شدن کاشی، علت جدا شدن کاشی از دیوار است.
نحوه رفع لقی یک کاشی از دیوار
برای رفع لقی یک کاشی در دیوار، ابتدا ابزارهای مورد نیاز شامل پودر بندکشی، دریل، گان چسب و اسفنج و صابون را آماده کرده و کار را با استفاده از دریل آغاز کنید و در چهار سمت کاشی، روی درزها، سوراخ هایی به عمق ۲ سانتی متر ایجاد نمایید. سپس محیط را با جارو یا دستمال مرطوب تمیز کنید.
پودر بند کشی سرامیک را با آب مخلوط کرده و آن را در منافذ ایجاد شده بریزید. در صورتی که پودر بندکشی به بیرون نشت کرد، با اسفنج و صابون آن را پاک کنید. بعد از مدتی اجازه دهید تا بندکشی کاملا خشک شود.
نحوه چسباندن کاشی با استفاده از دوغاب کشی
برای رفع لقی کاشی دیوار با دوغاب سیمانی، ابتدا علت جدا شدن کاشی از دیوار را بررسی کنید. اگر مشکل ساختاری باشد، به متخصص مراجعه کنید. در غیر این صورت، مراحل زیر را دنبال کنید:
- انتخاب ماده بندکشی: بر اساس عرض خطوط بند و اندازه کاشی ها، ماده بندکشی مناسب را انتخاب کنید (سمباده دار یا بدون سمباده).
- مخلوط کردن ماده بندکشی: طبق دستور روی جعبه، ماده بندکشی را مخلوط کرده و با مته یا همزن هم بزنید.
- پخش ماده بندکشی: ماده بندکشی را به طور یکنواخت در شکاف های بین کاشی ها با استفاده از ماله پخش کنید.
- تمیز کردن محیط: ماده بندکشی اضافی که به بیرون نشت کرده را تمیز نمایید.
- استراحت ماده بندکشی: بگذارید ماده بندکشی بین 24 تا 72 ساعت خشک شود.
چگونه می توان از جدا شدن کاشی از دیوار جلوگیری کرد؟
کاشی و سرامیک برای زیباسازی و تقویت سطوح در نازک کاری ساختمان ها استفاده می شوند، اما ممکن است طول عمر آن ها به دلایل مختلف کاهش یابد. برای جلوگیری از شکستگی کاشی، انتخاب کاشی مرغوب و بندکشی نیز نقش مهمی در جلوگیری از لقی کاشی دارند.
رطوبت، فشار و مواد شوینده می توانند باعث خوردگی ماده بندکشی و از بین رفتن فضای بین کاشی ها شوند. برای پیشگیری از لق شدن کاشی، بهتر است به جای دوغاب سنتی از پودر بندکشی سیمانی استفاده کنید و همچنین از چسب کاشی و آب بند کننده ها بهره ببرید.
نکات مهم در جلوگیری از جدا شدن کاشی از دیوار
برای جلوگیری از جدا شدن کاشی و شناسایی علت جدا شدن کاشی از دیوار، توجه به نکات مهم زیر اهمیت زیادی دارد.
انتخاب کاشی جایگزین
قبل از اقدام به تعمیر، نوع کاشی را که می خواهید به عنوان جایگزین استفاده کنید، تعیین نمایید. اگر مدت زیادی از نصب کاشی گذشته باشد، ممکن است پیدا کردن همان طرح دشوار باشد.
بررسی نیاز به دریل
پیش از برداشتن کاشی لق شده، بررسی کنید که آیا نیاز به دریل کردن و ایجاد حفره هست یا خیر. اگر فقط کاشی لق شده و آسیب ندیده است، می توانید آن را با چسب یا ملات سیمانی به حالت اولیه خود برگردانید.
مشاوره با فروشنده
با فروشنده مصالح مشورت کنید تا مواد مناسب و همخوان با کاشی مورد نظر را تهیه نمایید. استفاده از مصالح نامناسب می تواند باعث لق شدن دوباره کاشی شود، بنابراین انتخاب درست مصالح از اهمیت بالایی برخوردار است.
توجه به قیمت
در هنگام انتخاب کاشی و مصالح، به قیمت آن ها هم توجه داشته باشید. گاهی اوقات پایین بودن غیرمنطقی قیمت سرامیک پرسلان دیواری یا مدل های دیگر کاشی و سرامیک، به دلیل پایین بودن کیفیت آنهاست و قطعا چنین سرامیک ها و کاشی هایی بعد از مدت کوتاهی استفاده، یا به طور کامل از دیوار جدا می شوند و یا تغییر رنگ و ظاهر خواهند داد.
به این ترتیب، هرگز نباید کیفیت را فدای قیمت کنید و حتماً دقت داشته باشید که فروشنده، قیمتی منطقی (نه خیلی زیاد و نه خیلی پایین) برای محصولات خود اعلام کند.
بایدها و نبایدهای نصب درست کاشی روی دیوار
برای رفع لقی کاشی دیوار، رعایت برخی بایدها و نبایدها اهمیت زیادی دارد و می تواند تأثیرات مثبتی بر نتیجه نهایی کار شما بگذارد. موارد زیر را در نظر داشته باشید:
ایجاد سوراخ سطحی
هنگام استفاده از دریل، سعی کنید سوراخ عمیقی روی کاشی ایجاد نکنید. دریل کردن به عمق زیاد می تواند مقاومت کاشی را کاهش داده و باعث شکستن آن شود. بنابراین، اگر باید حفره ای ایجاد کنید، آن را با دقت و به عمق کم انجام دهید تا از آسیب به کاشی جلوگیری شود.
نظافت پس از چسباندن
اگر از چسب برای رفع لقی کاشی استفاده می کنید، پس از چسباندن، نظافت مناسب را فراموش نکنید. قبل از شروع کار، یک دستمال نرم آماده کنید تا بتوانید چسب اضافی را که ممکن است از لابه لای درزها نشت کند، پاک نمایید. این کار باعث می شود که محیط کار تمیز بماند و ظاهر کاشی به خوبی حفظ شود.
مراقبت از کاشی های اطراف
هنگام چسباندن کاشی لق شده، به کاشی های اطراف آن توجه داشته باشید. با کوچک ترین ضربه به این کاشی ها، ممکن است آن ها نیز دچار شکستگی یا آسیب شوند. بنابراین احتیاط کرده و از فشار اضافی روی کاشی های مجاور خودداری کنید؛ چرا که اینکار می تواند علت جدا شدن کاشی از دیوار باشد.
رعایت ایمنی
ایمنی کار در هنگام انجام هرگونه تعمیرات فنی بسیار حیاتی است. از تجهیزات ایمنی مانند ماسک مخصوص، دستکش و عینک حفاظتی استفاده کنید. این تجهیزات نه تنها از شما در برابر گرد و غبار و ریزه تراشه های کاشی محافظت کرده، بلکه از آسیب به چشم ها نیز جلوگیری می کنند. برخورد ناخواسته مواد یا اجزای تیز به چشم می تواند باعث ایجاد جراحت شود.
سخن پایانی
جدا شدن کاشی از دیوار می تواند ناشی از عواملی همچون استفاده از کاشی های نامرغوب، مشکلات مربوط به دوغاب ریزی و تکنیک های نصب نادرست باشد. انتخاب کاشی با کیفیت پایین می تواند باعث کاهش چسبندگی و مقاومت آن شود. همچنین، خوردگی دوغاب به دلیل رطوبت، مواد شوینده و سایش می تواند فضای بین کاشی ها را خالی کند و منجر به لقی و جدا شدن آن ها گردد.
علاوه بر این، نصب نادرست شامل استفاده نامناسب از چسب یا عدم تمیزی سطح زیرین نیز می تواند عاملی برای این مشکل باشد. بنابراین، توجه به کیفیت مصالح، انتخاب درست متریال و رعایت اصول صحیح در نصب و نگهداری، می تواند به جلوگیری از این مشکل کمک کند.
سوالات متداول
برای جلوگیری از لق شدن کاشی دیوار چه اقداماتی باید انجام داد؟
برای جلوگیری از لق شدن کاشی دیوار، ابتدا باید کاشی مرغوب انتخاب کنید. استفاده از پودر بندکشی ضد اسید و آنتی باکتریال به جای دوغاب سنتی و همچنین استفاده از چسب کاشی مناسب و آب بند کننده ها نیز اهمیت دارد. این موارد کمک می کنند تا از رطوبت و عوامل آسیب زننده جلوگیری شده و عمر کاشی ها افزایش یابد.
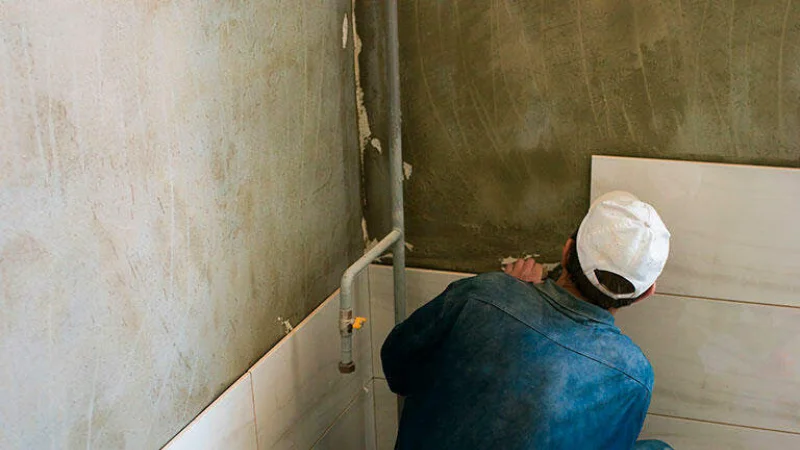
مراحل نصب کاشی دیواری چگونه است؟
برای نصب صحیح کاشی دیواری، ابتدا کاشی های لق را با دقت خارج کنید و سپس سطح زیرین را تمیز نمایید تا هیچ گونه باقی مانده چسب یا پودربندکشی وجود نداشته باشد. سپس، از ملات یا چسب مناسب استفاده کرده و آن را به صورت یکنواخت بر روی سطح زیر کاشی پخش کنید. در نهایت، کاشی را در محل مورد نظر قرار داده و با فشار محکم کنید تا هم تراز و ثابت بماند. با این روش می توانید نصب کاشی را به درستی انجام دهید.
چرا صاف نبودن سطح زیرین کاشی دیوار باعث لقی آن می شود و چگونه می توان این مشکل را رفع کرد؟
صاف نبودن سطح زیرین کاشی موجب ایجاد پستی و بلندی هایی می شود که مانع چسبندگی صحیح ملات و کاشی می گردد. برای رفع لقی کاشی دیوار، ابتدا باید فضای زیر آن را هم سطح کنید و سپس کاشی یا سرامیک را بچسبانید تا از لقی جلوگیری شود.