


اکثر افراد تصور می کنند که برای تعویض کاشی و سرامیک ها و نصب کاشی های جدید، باید حتماً کاشی ها و سرامیک های قبلی را از روی دیوار کنده و حذف کرد؛ اما به دلیل وجود روش ها و تکنولوژی های جدید، امروزه می توان به کمک چسب مخصوص، کاشی های جدید را روی همان کاشی های قدیمی هم نصب کرد.
نصب سرامیک با چسب روی موزاییک دردسرهای تعویض کاشی و سرامیک را به حداقل می رساند. ما در این مطلب، به بررسی ابزارهای مورد نیاز و مراحل انجام این کار می پردازیم.
ابزارهای لازم برای نصب سرامیک روی موزاییک
چسب سرامیک، یک محصول بسیار قدرتمند است که با استفاده از آن، می توان انواع سرامیک پرسلان کف و دیوار را روی سرامیک ها و موزاییک های قدیمی چسباند. البته انجام این کار، به ابزارهای خاصی نیاز دارد تا فرآیند تعویض کاشی و سرامیک به بهترین شکل ممکن انجام شود. از جمله ابزارهای مورد نیاز، می توان به موارد زیر اشاره کرد:
- کاشی یا سرامیک های جدید با طرح و رنگ دلخواه به تعداد لازم
- چسب مخصوص کاشی و سرامیک
- پتک چوبی
- سنباده برقی یا معمولی
- ماله مخصوص گچ بری
- اسپیسر
- دوغاب
- فاصله دهنده کاشی و سرامیک
- چند عدد سرامیک کهنه و قدیمی برای ترمیم محل شکستگی موزاییک های زیرین و یک دست کردن سطح کار
مراحل نصب سرامیک با چسب روی موزاییک
بعد از اینکه ابزارهای لازم را گردآوری کردید، نوبت به نصب کاشی و سرامیک های جدید به کمک چسب می رسد. مراحل و نحوه استفاده از چسب سرامیک برای نصب کاشی و سرامیک روی موزاییک، به صورت زیر است:
مرحله اول
در ابتدا باید طرح و نمایی کلی پروژه مورد نظر را به خوبی در ذهنتان یا روی کاغذ طراحی کرده و مطمئن شوید که دقیقا به چه چیزی نیاز دارید. با این کار، از هر گونه تغییر و اصلاح در آینده بی نیاز خواهید شد.
توجه داشته باشید که نصب سرامیک های جدید روی محصولات قدیمی، حدود 5/1 سانتی متر به ارتفاع و عرض دیوار یا کف اضافه خواهد شد؛ پس امکان دارد مواردی مثل چهارچوب درب، محل کلید و پریزها و موارد دیگری از این قبیل، عمق بیشتری در دیوار پیدا کنند و نیاز به اصلاح داشته باشند.
مرحله دوم
در این مرحله از نصب سرامیک با چسب روی موزاییک، باید زیرسازی سطح را انجام دهید؛ یعنی سطح دیوار یا کف ساختمان باید کاملاً صاف و بدون مشکل باشد. اگر بخشی از موزاییک های قدیمی شکسته یا سست شده، حتماً آن ها را تعمیر کرده یا با موزاییک ها و کاشی های کهنه ولی سالم جایگزین کنید.
مرحله سوم
حالا باید سطح کار کاملاً تمیز و عاری از هرگونه چربی، روغن، گرد و غبار یا هر آلودگی دیگر باشد. برای این منظور می توانید موزاییک های قدیمی را کاملاً شسته و تمیز کنید تا آلودگی ها مانع از چسبیدن صحیح کاشی های جدید نشوند.
مرحله چهارم
حالا سطح موزاییک ها یا کاشی های موجود را با یک سنباده برقی یا کاغذ سنباده درشت، کاملا سنباده بکشید تا از حالت صاف و صیقلی خود خارج شده و خراش هایی روی سطحشان پدید بیاید. علت این کار این است که سطح کاملا صاف، ممکن است میزان چسبندگی مطلوب را برای نصب سرامیک پرسلان یا دیگر انواع کاشی و سرامیک ایجاد نکند.
سپس یک بار دیگر، سطح کاشی و موزاییک ها را به خوبی بشویید تا گرد و غبارهای حاصل از سنباده کشی از بین بروند. همچنین می توان برای زبر کردن سطح از پرایمرهای مخصوص استفاده کرد.
قبل از اعمال چسب، از استحکام سطح زیر کار اطمینان حاصل کنید.
مرحله پنجم
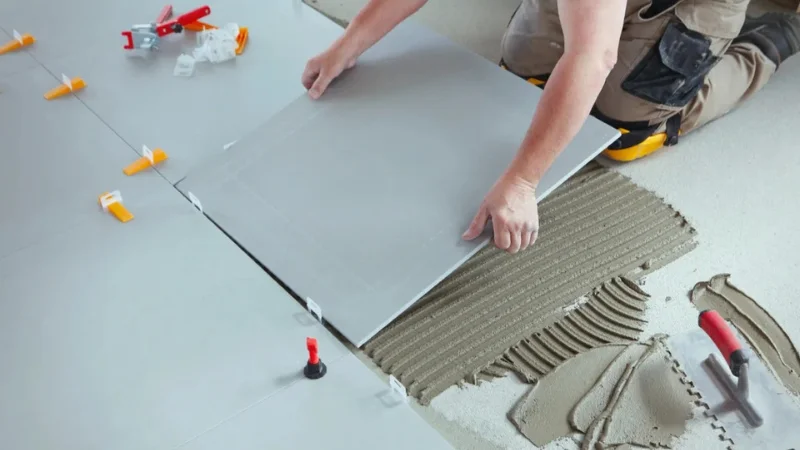
در این مرحله نوبت به استفاده از چسب مخصوص می رسد. چسب کاشی و سرامیک را با توجه به دستورالعمل درج شده روی بسته بندی آن حاضر کرده و سپس یک لایه نازک از آن را در قسمت کوچکی از موزاییک و کاشی های موجود و پشت سرامیک جدید (روش ترکیب شده) پخش کنید.
سپس بلافاصله کاشی ها و سرامیک های جدید را روی آن بچسبانید و کمی با دست فشار دهید. در صورت نیاز می توانید به آرامی با پتک به آن ها ضربه بزنید تا مطمئن شوید که کاملاً چسبیده اند.
مرحله ششم
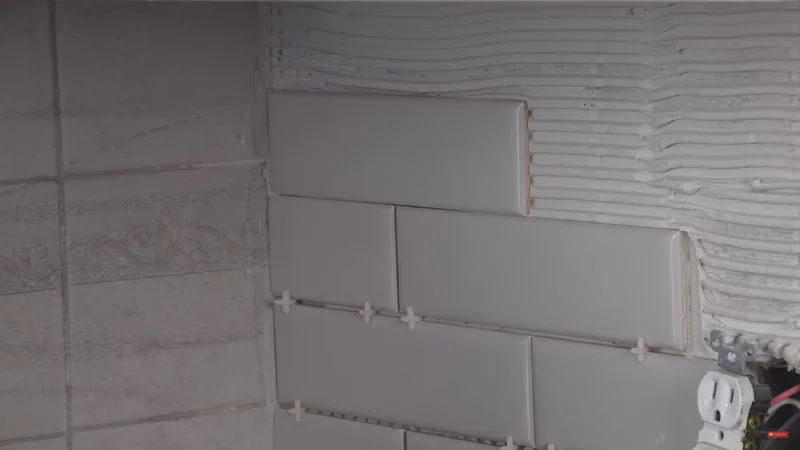
در این مرحله باید حداقل 24 ساعت زمان بدهید تا چسب ها کاملاً خشک شده و کاشی ها و سرامیک ها به محل مورد نظر چسبیده باشند. سپس باید فواصل ایجاد شده بین سرامیک ها را با مقداری مواد بندکشی مناسب ، به خوبی بپوشانید.
سطح بندکشی شده را بلافاصله تمیز کنید تا ظاهر نهایی کارتان خراب نشود. بعد از سفت شدن ماده بندکشی ، کارتان به پایان می رسد.
جمع بندی
در این مطلب سعی کردیم نحوه نصب سرامیک با چسب روی موزاییک را به شما آموزش دهیم. امیدواریم به خوبی با مراحل انجام این کار آشنا شده باشید. اگر همچنان سوألی در ذهنتان باقی مانده، برایمان کامنت بگذارید.